Use tiny text editor for textarea
Pre-requisites: Basic Understanding HTML and JQuery.
In this project:
- We will add WYSIWYG HTML Editor to the textarea.
- WYSIWYG is what you see is what you get. This editor enables the user to see the end results when it will be printed on the screen.
- We will use JQuery to implement this editor.
- It will be converted to the plain HTML in order to submit it to the server.
TinyMCE is one of the web-based text editor which can be embedded in our webpage using TinyMCE plugin.
<!DOCTYPE html>
<html>
    <head>
        <title>HTML Text Editor</title>
        <script src="js/jquery.js"></script>
        <script src="tinymce/tinymce.min.js"></script>
    </head>
    <body>
        <form method="POST" action="" id="myForm">
            <textarea id="editor" name="user_details"></textarea>
            <br><br>
            <button type="button" name="submit" id="submit">SUBMIT DETAILS</button>
        </form>
    </body>
    <script>
        tinymce.init({
            selector: '#editor',
            width: 700,
            height: 350
        });
        $(document).ready(function(){
            $("#submit").click(function(e){
                var content = tinyMCE.activeEditor.getContent();
                $('#editor').val(content);
                var data = $("#editor").val();
                if(data == ''){
                    alert("Please enter details");
                }else{
                    $.ajax({
                        type: "POST",
                        url: "process.php",
                        data: $("#myForm").serialize(),
                        success: function(data){
                            alert(data);
                        }
                    });
                }
            });
        });
    </script>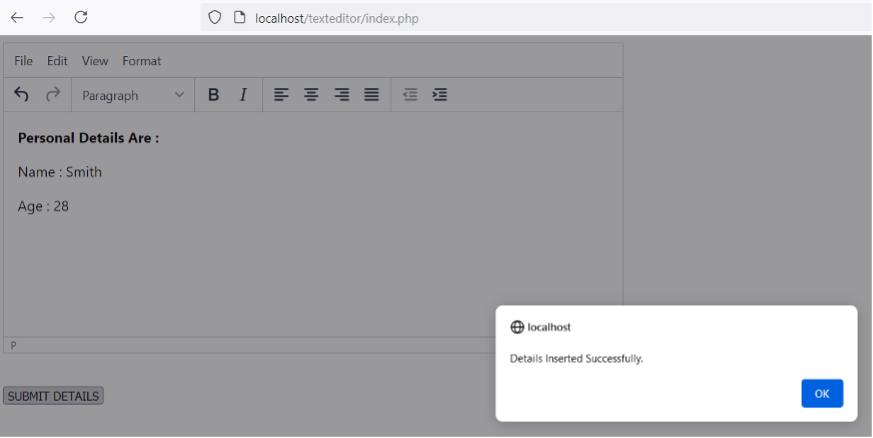
</html>Run Index.php file in your browser to get the following output. URL may look like as follows:
Code Explanation of texteditor/index.php |
||
|
1. |
|
Include JQuery file inside <head> tag of the page. |
|
2. |
|
Include tinymce.min.js file downloaded from |
|
3. |
|
<textarea></textarea> tag is added to the HTML with |
|
4. |
|
Tiny Editor is initialized using this code. We have customized its height and width also. |
|
5. |
|
To get the contents of the editor and assign them to the variable content. |
|
6. |
|
Ajax is used to submit the form data to the server and to display the results. |
Code Explanation of texteditor/process.php |
||
|
1. |
|
Connection is build with database ‘db’. |
|
2. |
|
Values are inserted into table user_details |
|
3. |
|
On successful insertion, success message is displayed. Otherwise, error is displayed. |
Summary
In this project, we have learned to embed tinymce editor plugin on our webpage.
JQuery and tinymce.js is mentioned inside the head tag and then textarea is created using simple HTML. Predefined JS method is called in order to implement the WYSIWYG editor on our page.
We have also used empty validation check before submitting the form. Details are submitted to the server with the help of Ajax.
We have also learned how to receive the posted value on the server side and the details are also stored in a database using MySQLi. Message is displayed to the user on successful insertion.
